The Ultimate Guide to Getting a Free Domain Name (Without Hosting) 2025

So, you’re ready to start your first website but don’t want to spend a single rupee (or dollar) on a domain name yet? Maybe you just want a clean-looking email address for job applications, or a link that looks more professional than “facebook.com/freedomainname”.

Here’s the big question: Can you really get a free domain name without buying a hosting plan?

The short answer: Yes, you can.
But (and this is a big but), free domains always come with some strings attached. In this guide, I’ll explain the types of free domains, where to get them, their pros and cons, and how you can actually start using one today.


Section 1: Understanding “Free Domains”

Before we dive in, let’s get clear on what a domain even is.

What is a Domain?
Think of a domain like your house address. If your website is your house, then your domain is the address people type into Google Maps (or in this case, their browser) to find you. Example: yourwebsite.com.

Now here’s the catch: not all “free” domains are the same. You’ll usually run into two types:

1. Subdomains

Example: yourname.wordpress.com or yourname.weebly.com

  • How it works: You sign up for a free plan with a website builder, and they give you a free “subdomain” under their brand.
  • Limitations: It’s not truly yours. You can’t transfer it, and it always shows the platform’s name. So, instead of looking like a pro, it kinda looks like you’re just borrowing space.

2. Free Top-Level Domains (TLDs)

Example: .tk, .ml, .ga, .cf, .gq

  • How it works: Some registrars like Freenom give these away for free.
  • Limitations: They have a bit of a bad reputation. Because spammers often use them, some email providers or even search engines might not trust them. Also, the registrar can sometimes take back the domain without much warning.

Section 2: The Best Options for Free Domain Name

Alright, let’s talk about the actual ways you can get a free domain today.

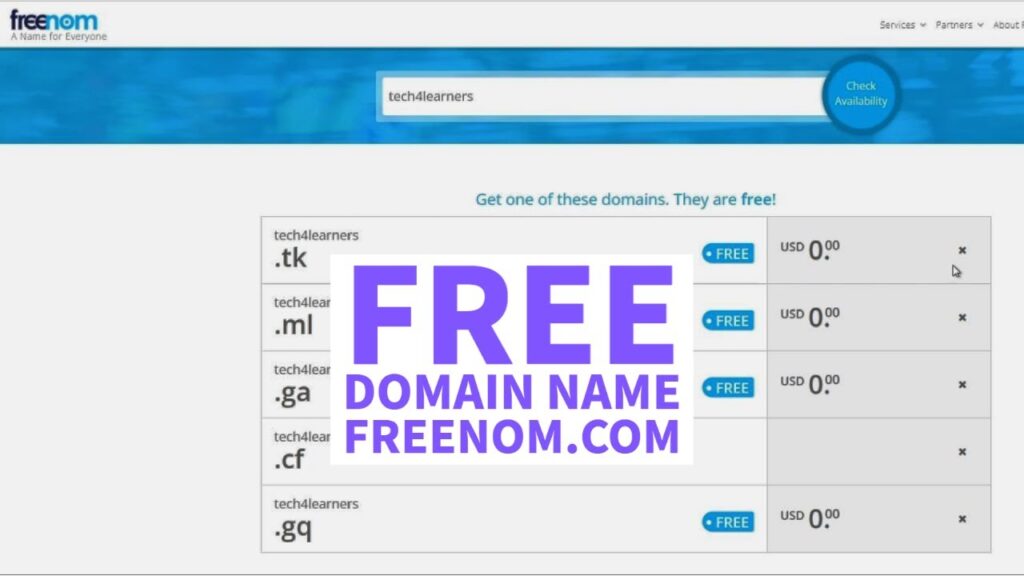
Option 1: Free TLD Registrars (like Freenom)

Steps:

  1. Go to Freenom’s website.
  2. Search for the name you want.
  3. Pick one of the free extensions (.tk, .ml, etc.).
  4. Create a free account and register.
  5. Point it to wherever you want (like a GitHub page or even your social media).
  • Pros: You get a real TLD. It works outside of any website builder.
  • Cons: Risky. The domain can vanish. Some services block these domains because they’re seen as spammy.
free domain names
free domain names

Option 2: Free Domain Names with Email Services

Some email providers (like Zoho Mail or Neo) give you a free domain if you use their email service.

  • Pros: You instantly get a professional-looking email (like me@mydomain.com). You can also link it to a landing page or social media.
  • Cons: The domain is tied to the email service. If you stop using the service, you might lose the domain.

Option 3: Website Builders’ Free Subdomains

Platforms like Wix, WordPress.com, and Weebly will give you a free subdomain if you use their free plan.

  • Pros: Dead simple. You sign up, pick a template, and you’re live in minutes.
  • Cons: It’s not your own domain. It screams “free site,” and you’re stuck with that platform unless you pay.

Section 3: What to Do with Your Free Domain

Once you’ve got a free domain, here are a few smart things you can do with it:

  • Redirect to Your Social Media Page: Want a cleaner link to your Instagram or LinkedIn? Just point your domain there. yourname.tk looks better than linkedin.com/in/123randomnumbers.
  • Create a Simple Landing Page: With GitHub Pages or Carrd, you can build a simple one-page site with your contact info, portfolio, or resume.
  • Set Up a Professional Email: Use it to create an email like hello@yourname.tk to look more polished when reaching out to clients or employers.

Conclusion

So, can you get a free domain without hosting? Absolutely.

  • If you just need something quick and simple → go with a free subdomain.
  • If you want an actual domain name → try Freenom or email services.

But here’s the truth: free domains are usually temporary solutions. They’re fine for learning, testing, or just playing around, but not ideal for building a serious online brand.

My advice: If you’re even a little serious about your website, grab a paid domain. You can usually find deals for less than $5 in the first year on sites like Namecheap or GoDaddy. That way, it’s truly yours, with no surprises.

👉 Start free if you must, but keep an eye on upgrading to a proper domain once you’re ready to grow.

Read more….

Free Lifetime Hosting and DNS with Blogger and Cloudflare: A Comprehensive Guide

In today’s digital landscape, building a website or blog has become easier than ever, with numerous platforms and tools available. However, one major challenge remains for most individuals and small businesses—hosting and domain-related expenses. Luckily, by combining Blogger and Cloudflare, you can create a robust website with free lifetime hosting and free DNS management.

This article delves into how to leverage these tools to set up and maintain a professional website at no cost, ensuring reliability, scalability, and security.


Understanding Blogger and Cloudflare

1. What is Blogger?

Blogger is a free blogging platform owned by Google that offers:

  • Free Hosting: Blogger hosts your content on Google’s servers, ensuring reliability and speed.
  • Custom Domain Support: You can use your own domain (e.g., www.example.com) instead of a *.blogspot.com subdomain.
  • Integrated Google Services: Includes seamless integration with Google Analytics, AdSense, and Search Console.

2. What is Cloudflare?

Cloudflare is a Content Delivery Network (CDN) and DNS management service that offers:

  • Free DNS Hosting: Manage your domain’s DNS for free.
  • Security Enhancements: Protect your site with SSL certificates, DDoS mitigation, and a Web Application Firewall (WAF).
  • Performance Boosts: Caching and CDN features speed up your site for global audiences.

When combined, Blogger and Cloudflare create a powerful system for hosting and managing a website with zero hosting costs.


Benefits of Using Blogger and Cloudflare

1. Cost-Free Hosting

  • Blogger provides free, unlimited hosting for your blog or website.
  • Cloudflare’s free tier includes DNS management, caching, and SSL certificates.

2. High Reliability

  • Blogger benefits from Google’s server infrastructure, ensuring 99.9% uptime.
  • Cloudflare adds a layer of redundancy and global reach through its CDN.

3. Security

  • Blogger sites are inherently secure, with automatic HTTPS for *.blogspot.com subdomains.
  • Cloudflare enhances security with DDoS protection, WAF, and free SSL for custom domains.

4. Customization

  • Blogger allows customization with themes, widgets, and custom HTML/CSS.
  • Cloudflare’s rules and settings let you optimize performance and security based on your needs.

5. Monetization Options

  • Use Blogger to integrate Google AdSense for earning revenue through ads.
  • Cloudflare ensures your site loads fast, enhancing user experience and ad impressions.

Step-by-Step Guide to Free Hosting with Blogger and Cloudflare

Step 1: Set Up Your Blog on Blogger

  1. Create a Blogger Account:
    • Sign in to Blogger with your Google account.
    • Click Create a Blog and choose a name and URL (e.g., myblog.blogspot.com).
  2. Customize Your Blog:
    • Choose a template from the available themes.
    • Add widgets like labels, popular posts, or an archive.
  3. Add Content:
    • Start creating posts using the built-in editor.
    • Add images, videos, or custom HTML to enhance your content.

Step 2: Buy a Custom Domain (Optional)

  • Purchase a domain from a registrar like Google Domains, Namecheap, or GoDaddy.
  • Example: Buy mywebsite.com to replace your default *.blogspot.com subdomain.

Step 3: Link Blogger to Your Custom Domain

  1. In Blogger, go to Settings > Custom Domain and enter your domain (e.g., www.mywebsite.com).
  2. Blogger will provide two CNAME records and four A records.
  3. Save these for use in Cloudflare.

Step 4: Set Up DNS with Cloudflare

  1. Sign Up on Cloudflare:
  2. Add Your Domain:
    • Enter your domain name (e.g., mywebsite.com) and let Cloudflare scan existing DNS records.
  3. Edit DNS Records:
    • Add the CNAME and A records provided by Blogger to your Cloudflare DNS settings.
  4. Enable SSL:
    • Under SSL/TLS, select Flexible SSL to ensure your site is served over HTTPS.
  5. Change Nameservers:
    • Update your domain’s nameservers to Cloudflare’s (provided during setup).
    • Wait a few hours for propagation.

Step 5: Optimize Cloudflare Settings

  1. Page Rules:
    • Add rules to cache everything or redirect HTTP to HTTPS.
  2. Caching:
    • Enable Cloudflare’s caching to improve performance for global visitors.
  3. Security Settings:
    • Enable DDoS protection and configure WAF for additional security.

How Blogger and Cloudflare Work Together

When integrated, Blogger handles your content hosting, while Cloudflare manages DNS and enhances performance/security. Here’s how they complement each other:

FeatureBloggerCloudflare
HostingFree, unlimitedNot applicable
DNS ManagementBasic (limited features)Advanced and free
SSL CertificatesAutomatic for blogspot.comFree for custom domains
PerformanceGoogle’s serversCDN and caching worldwide
SecurityBuilt-in HTTPSDDoS, WAF, and more

Maximizing the Potential of Your Blogger-Cloudflare Site

1. Enhance Your Design

  • Use third-party Blogger templates for professional designs.
  • Customize layouts using Blogger’s built-in HTML editor.

2. Focus on SEO

  • Add meta tags, descriptions, and alt attributes to your posts.
  • Use Cloudflare’s caching and performance settings to improve page load times, a critical factor for SEO.

3. Monetize Your Blog

  • Sign up for Google AdSense to earn from ads on your site.
  • Explore affiliate marketing or sponsored content opportunities.

4. Regularly Update Content

  • Publish new posts frequently to keep your audience engaged.
  • Use Blogger’s scheduling feature to plan posts in advance.

5. Monitor Analytics

  • Integrate Google Analytics to track visitor behavior and optimize your content strategy.

Limitations of Blogger and Cloudflare

While this setup offers many benefits, there are a few limitations:

Blogger Limitations

  • Less flexibility compared to self-hosted platforms like WordPress.
  • Limited plugin support.
  • Dependence on Google; content is subject to their policies.

Cloudflare Limitations

  • Free tier lacks advanced features like real-time analytics and prioritized support.
  • Caching may occasionally cause delays in displaying updates.

Who Should Use This Setup?

1. Beginners

Perfect for individuals or small businesses starting their online journey without significant investments.

2. Bloggers

Ideal for content creators who need reliable hosting and performance optimization at no cost.

3. Non-Profits and Small Businesses

A cost-effective solution for building a professional online presence.


Conclusion

By combining Blogger and Cloudflare, you can create a professional, secure, and high-performing website without spending a dime on hosting or DNS services. This setup is perfect for beginners, bloggers, and small businesses looking to minimize costs while maximizing online presence.

With Google’s reliable hosting and Cloudflare’s powerful DNS and performance enhancements, you can confidently manage and grow your website for years to come. The best part? It’s all free!

So, if you’ve been considering starting a blog or building a website, there’s no better time to harness the power of Blogger and Cloudflare.